
Tip: Start typing in the input box for immediate search results.
Canon/Papercut Printing with personal devices (Mac only)
This article outlines the install and troubleshooting steps for Mac devices and mobility print specifically. For others devices such as Windows please see the article found here https://cts.gordon.edu/knowledge/byod-printing/
Installing the Printers for Mac
1. Make sure your device is connected to the GordonNET wireless network
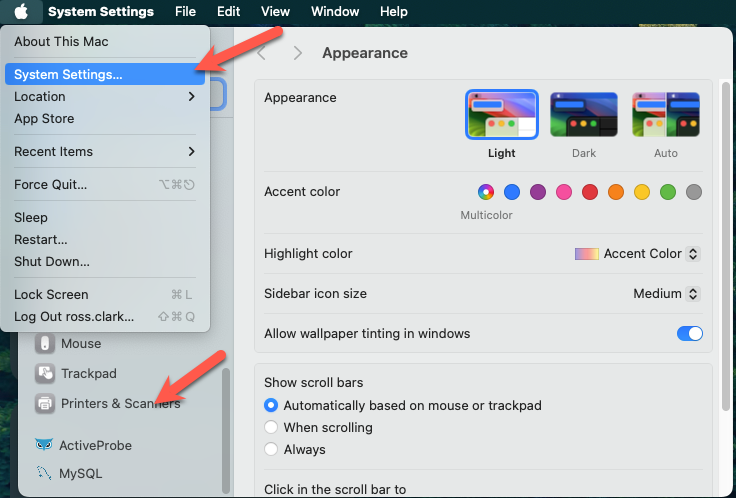
2. Go to System Settings -> Printers and Scanners
Click the Apple logo in the top bar, then select 'System Settings' from the dropdown menu. Note that on older versions of macOS, the interface may look different, but you should still be able to find 'System Preferences'. In the new window, locate and click on 'Printers and Scanners'.
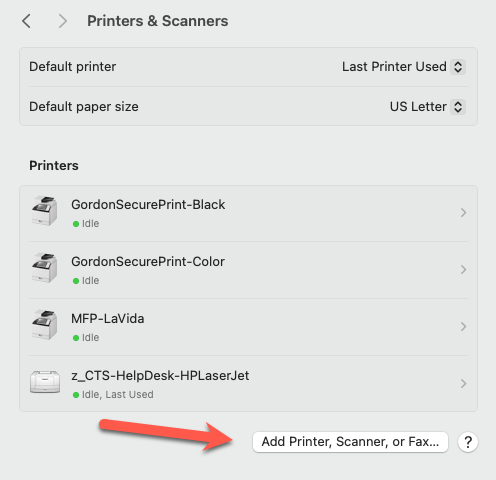
3. Click to add a new Printer
Once you're in the printer settings window, look for the option to add a new printer. On older versions of macOS, this option is typically represented by a + icon.
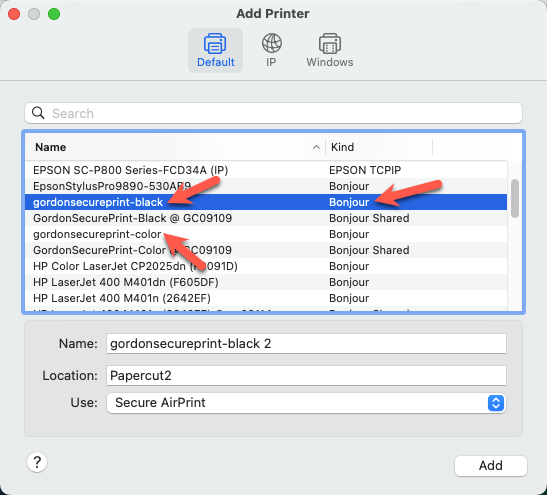
4. Look for GordonSecurePrint
In the new dialog box, you will see a list of nearby connections to choose from. Look specifically for the 'GordonSecurePrint' options, which may appear as black or color variants. Select the appropriate option and click 'Add'. Please note that these options are offered through a 'Bonjour' service. Avoid selecting any option labeled 'Bonjour Shared' as this may lead to errors.
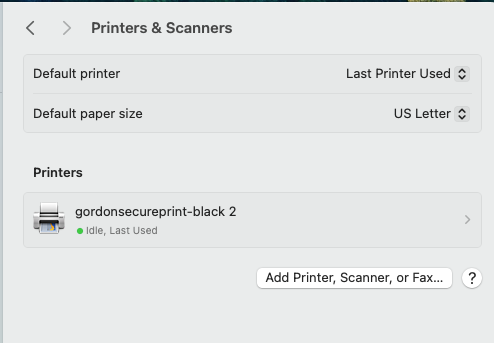
5. Click Add and you're almost ready to print!
No options need to be altered; the default settings are exactly what is needed. In your printers and scanners settings window, you will now see the newly installed printer
Using the Printers
1. Open the desired file and select GordonSecurePrint as the printer
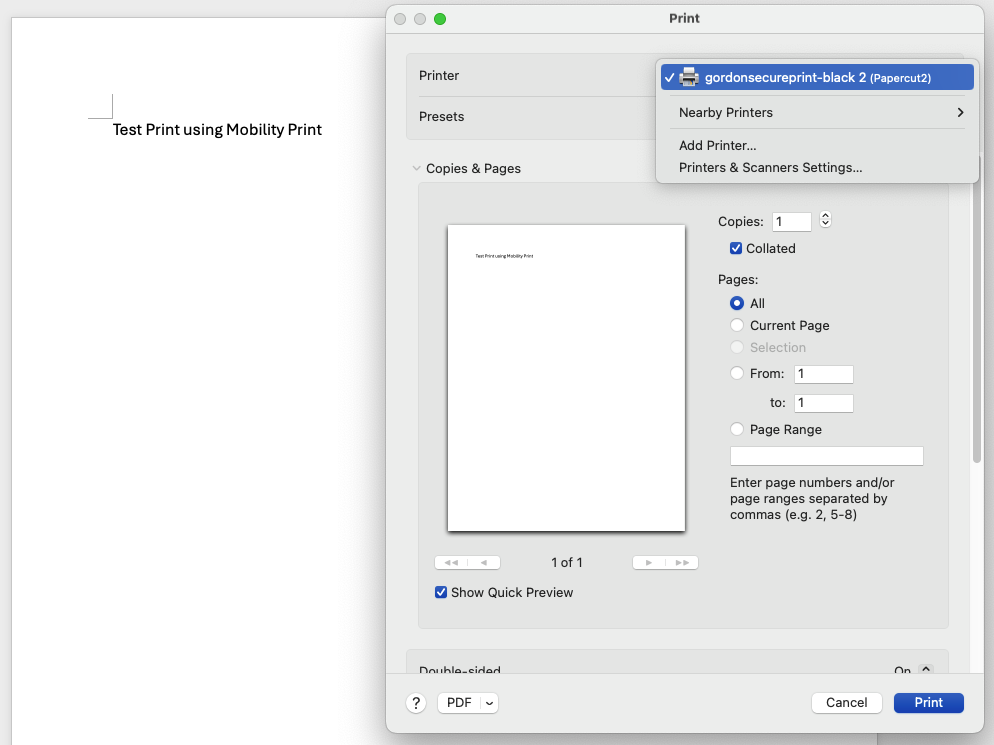
Open the file you would like to print. In the print dialog window, select the printer you would like to use by opening the dropdown printer list. In this case, choose 'GordonSecurePrint-Black'
In this window, you can also configure settings to determine which pages to print, specify the number of copies needed, and choose whether the document should be printed double-sided, along with various other options.
2. Authenticate to the Papercut printers
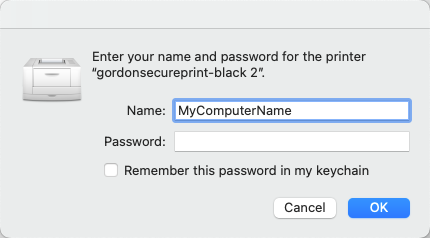
After selecting a printer, configuring any necessary settings, and clicking 'Print,' a new dialog will pop up, prompting you to enter your credentials for the printer
**By default, the username field is auto-filled with your computer's account name. Please be sure to change this to your Gordon Account**
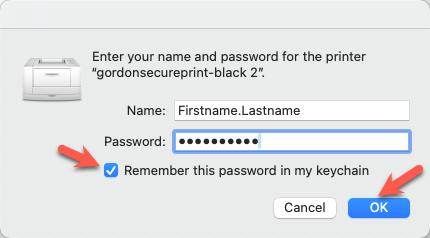
Clear out the auto-filled box and enter your Gordon username, as seen at the beginning of your email, along with the passphrase associated with your account
There is an option to remember your passphrase in Keychain to avoid needing to enter the credentials each time you would like to print. Only check this option when you are 100% sure your username and passphrase are correct to avoid any errors
3. Wait for document to be sent to the printer
Once authenticated, the document will begin sending, and you will see a printer status option along the bottom dock. This status will start to send and then disappear once the printing process is successful

Errors and Troubleshooting
Hold for Authentication
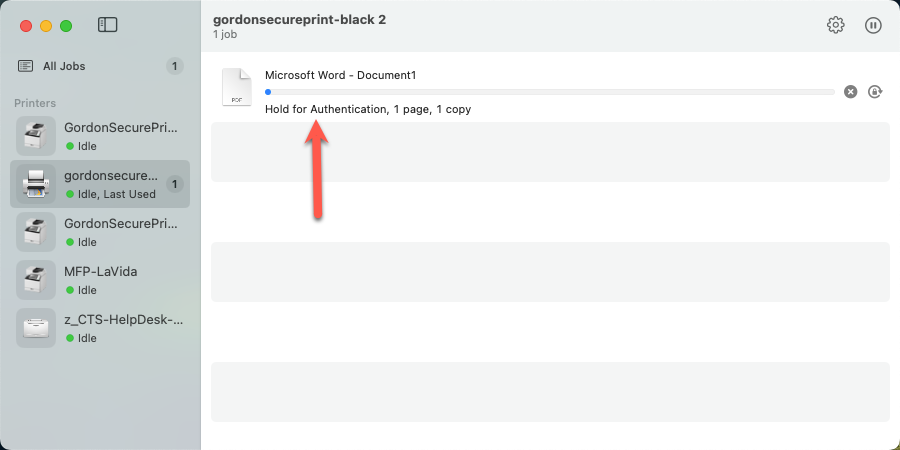
The 'hold for authentication' issue is the most common error encountered on Mac devices. This typically occurs due to an incorrect username or passphrase. In the print status window, you'll notice the document stuck with an error message displayed.
Fixing the issue when there is a prompt for passphrase
When prompted to enter your username and passphrase during printing, if there's a possibility of an error, you can cancel the print by hitting the 'X' in the status window
When attempting to print the same document again, ensure that the correct information is entered. Specifically, ensure that your Gordon username is used, not the auto-populated name, and remember to use your Gordon email passphrase, not necessarily the passphrase used to log in to your device.
If the issue persists, it's possible that your account has been locked out. Our security policy may lock your account after a few failed login attempts. If you believe this to be the case, please visit or call the helpdesk to have your account unlocked.
Fixing the issue with no prompt for passphrase
When you attempt to print and there's no popup requesting your username and passphrase, it's likely because you've chosen to remember your credentials. Since you're encountering the authentication error, it's possible that incorrect credentials have been saved. Begin by deleting the pending print in the printer status window.
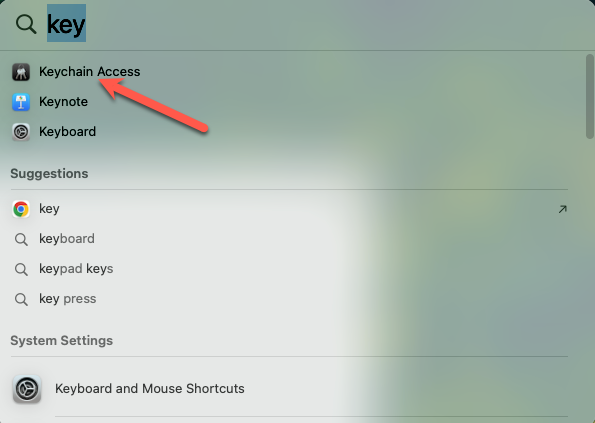
To access and manage these credentials, open the 'Keychain Access' application by pressing cmd + Spacebar and then typing 'Keychain Access' to search.
Before proceeding, you will be prompted to enter your laptop's login passphrase.
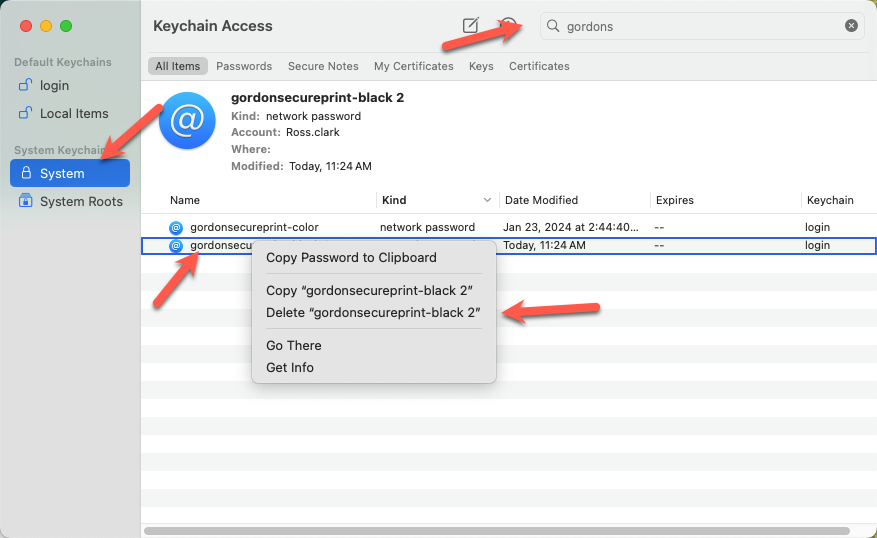
In the new window, navigate to the 'System' keychain. Use the top right search box to search for 'GordonSecure'. Locate the saved credentials, right-click on them, and choose 'Delete Record'
After deleting the credentials, attempt to print the same document again. This time, ensure that the correct information is entered. Specifically, use your Gordon username, not the auto-populated name, and remember to use your Gordon email passphrase, not necessarily the passphrase used to log in to your device.
If the issue persists, it's possible that your account has been locked out due to our security policy, which locks accounts after a few failed login attempts. If you believe this to be the case, please visit or call the helpdesk to have your account unlocked.
Contact CTS
If you are still experiencing issues that cannot be resolved with these steps, please visit the helpdesk during our business hours for further assistance.