
Tip: Start typing in the input box for immediate search results.
Specialty Paper Sizes on Campus Printers
Printing an existing doc
Mac/Apple
For this example, we'll print a poster that needs to be completed today. Since the document is required immediately, we'll use a campus Canon printer instead of submitting it externally.
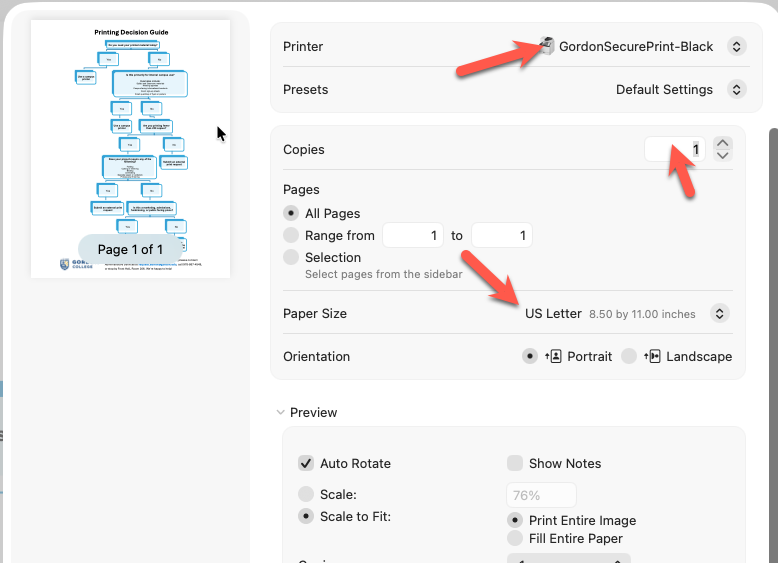
With the document open, select Print. On macOS, this opens the standard print dialog shown below.
The first image shows the default print dialog. The red arrows highlight the settings you should review before printing, including the printer, number of copies, paper size, and orientation. These arrows simply indicate which fields to check.
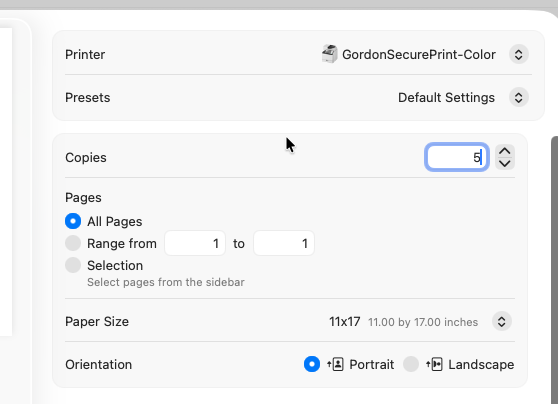
For this example, the settings have been updated to print an 11 × 17 poster using the campus color printer. Your settings may differ depending on your document. Select the appropriate printer, paper size, orientation, and number of copies based on your printing needs.
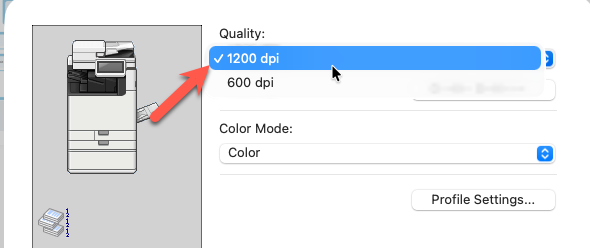
If you're printing a poster or another image-heavy document, you can improve print quality by changing the print resolution from 600 DPI to 1200 DPI. This produces sharper text and graphics, although print times may be slightly longer.
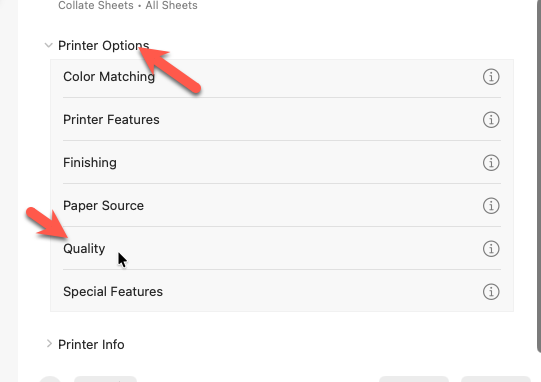
In most cases, the printer will automatically detect the paper size and select the appropriate tray. However, when printing on specialty paper or non-standard sizes, it's often helpful to manually specify the paper source.
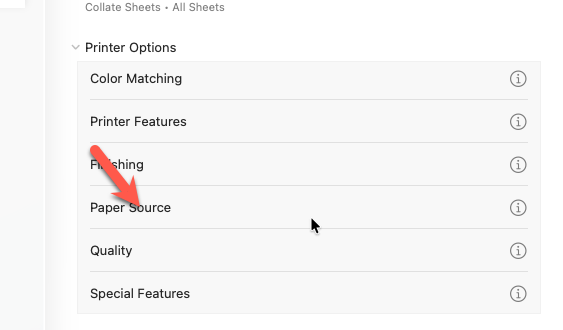
For this example, the paper has been loaded into the Multipurpose Tray, so select it as the paper source.
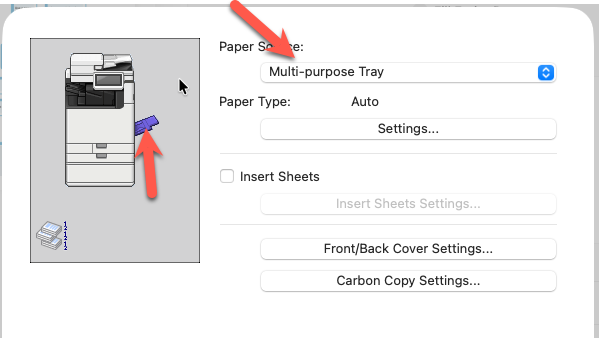
If your document only needs to print on one side, open the Finishing section and select 1-Sided Printing
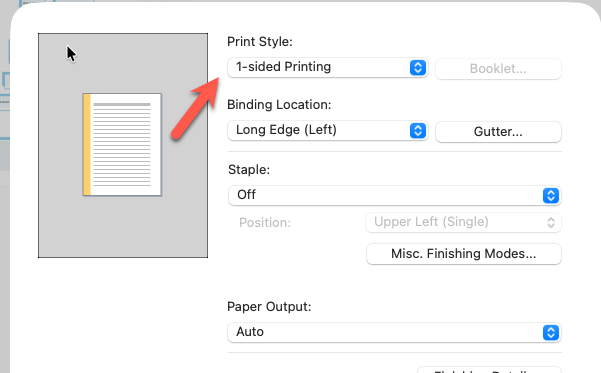
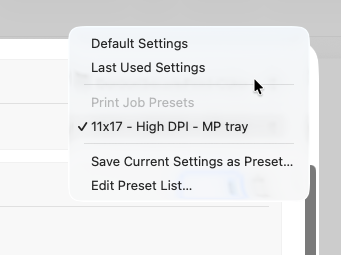
Once you've configured all of your print settings, you can save them as a preset to avoid repeating these steps in the future.
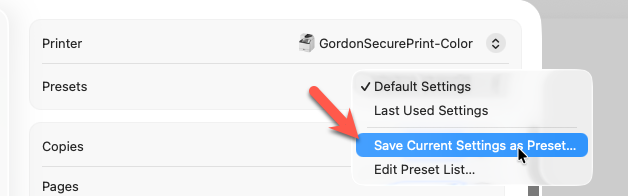
Give the preset a descriptive name, choose which printers it should be available for, and save it.
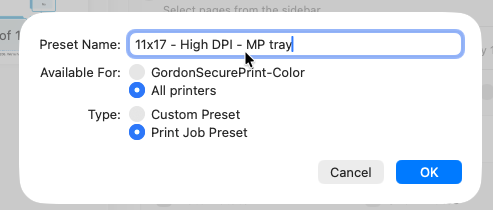
The next time you print a similar document, simply select your saved preset to automatically apply these settings.
PC/Windows
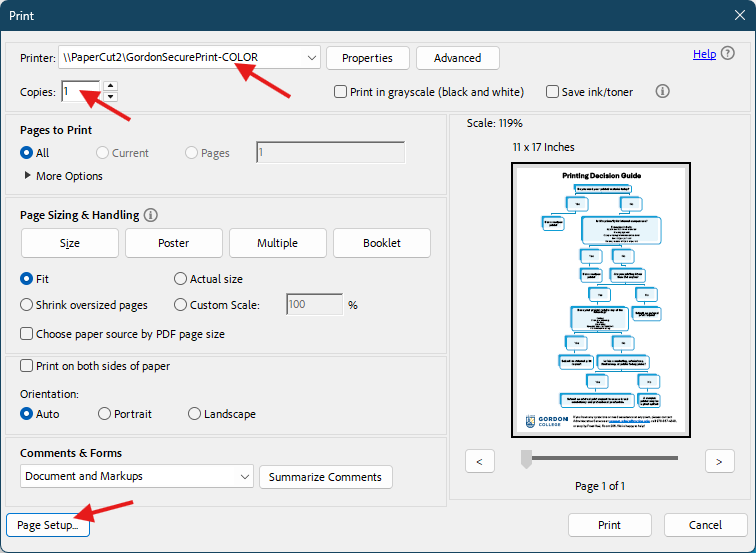
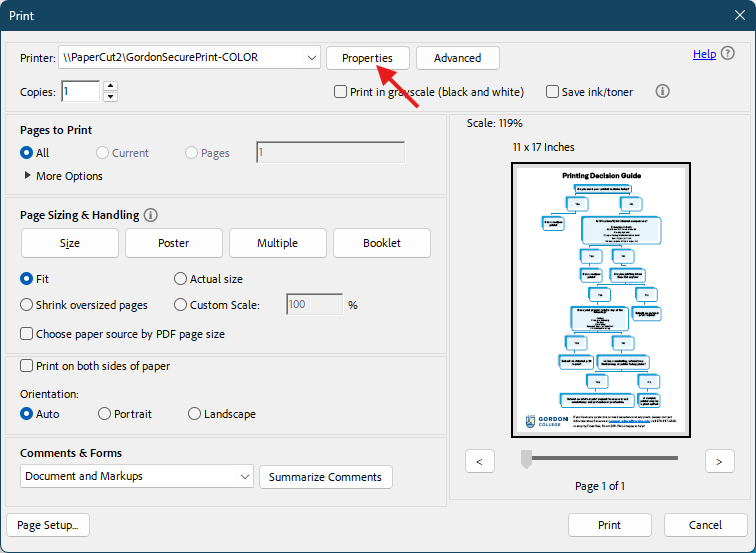
With your document open, select Print and choose the appropriate Gordon Secure Print queue (Color or Black). Review the number of copies, then select Page Setup to configure the paper size.
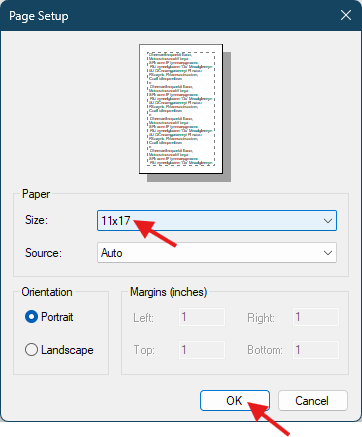
In the Page Setup window, select 11 × 17 (Tabloid) as the paper size, verify the page orientation, and select OK to return to the print window.
Select Properties to open the Canon printer driver, where you can configure additional print settings.
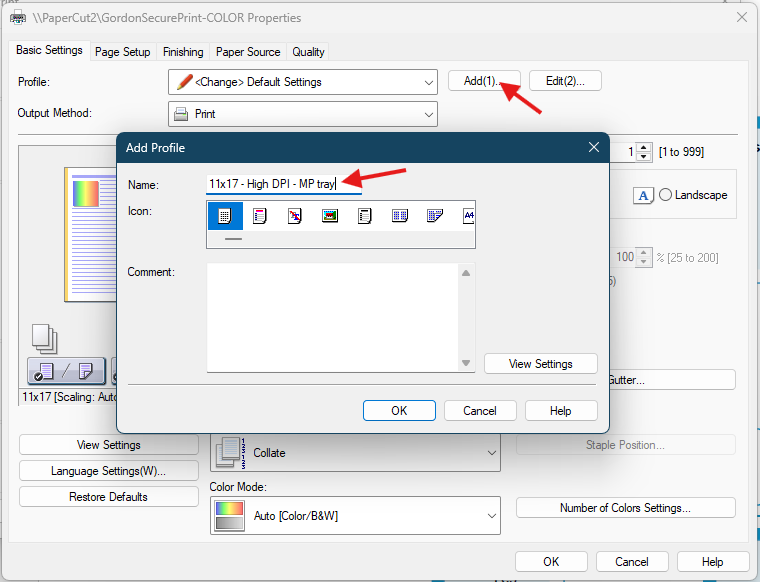
If you'll be printing this type of document regularly, select Add to save the current settings as a profile. Give the profile a descriptive name so it can be easily selected for future print jobs.
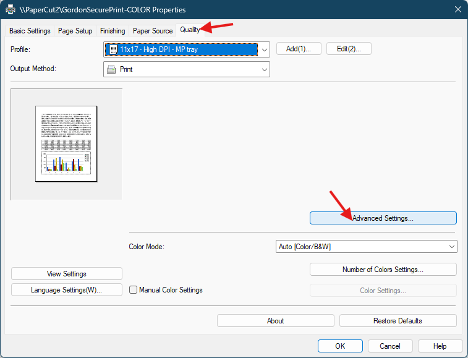
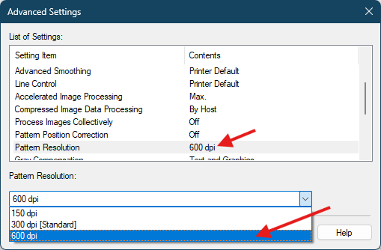
For posters or image-heavy documents, open the Quality tab and select Advanced Settings. Increase the print resolution from 600 DPI to 1200 DPI for improved text and image quality.
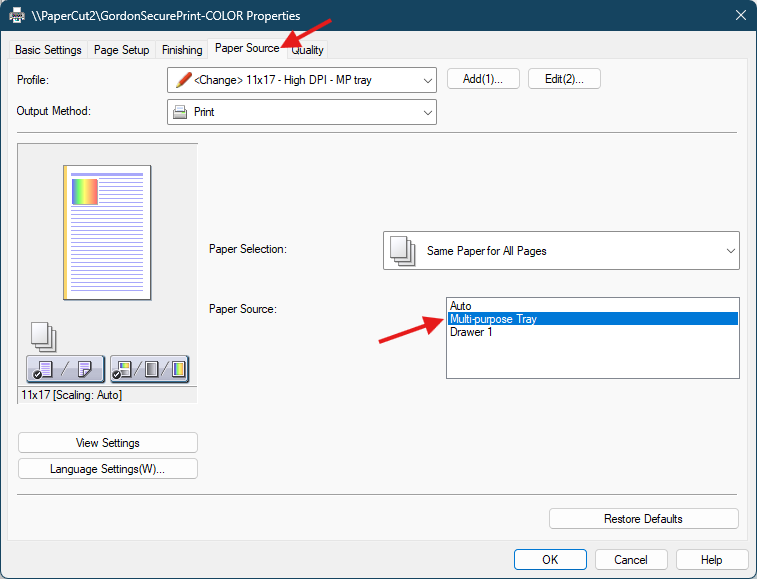
If you're printing on specialty paper or a non-standard paper size, open the Paper Source tab and select the tray containing the paper. In this example, the Multipurpose Tray is selected.
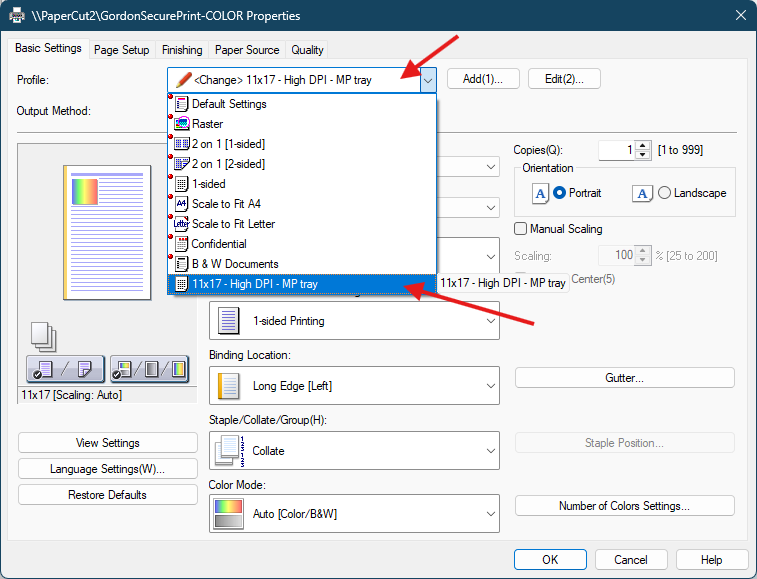
Once all settings have been configured, return to the Basic Settings tab and select your saved profile before printing. This will automatically apply your preferred paper size, quality, paper source, and finishing settings.
Once your print job has been submitted, continue with the Printing at the Printer section below. The remaining steps are the same for both Mac and Windows users.
Printing at the printer
Before releasing your print job, make sure the correct paper has been loaded into the appropriate tray.
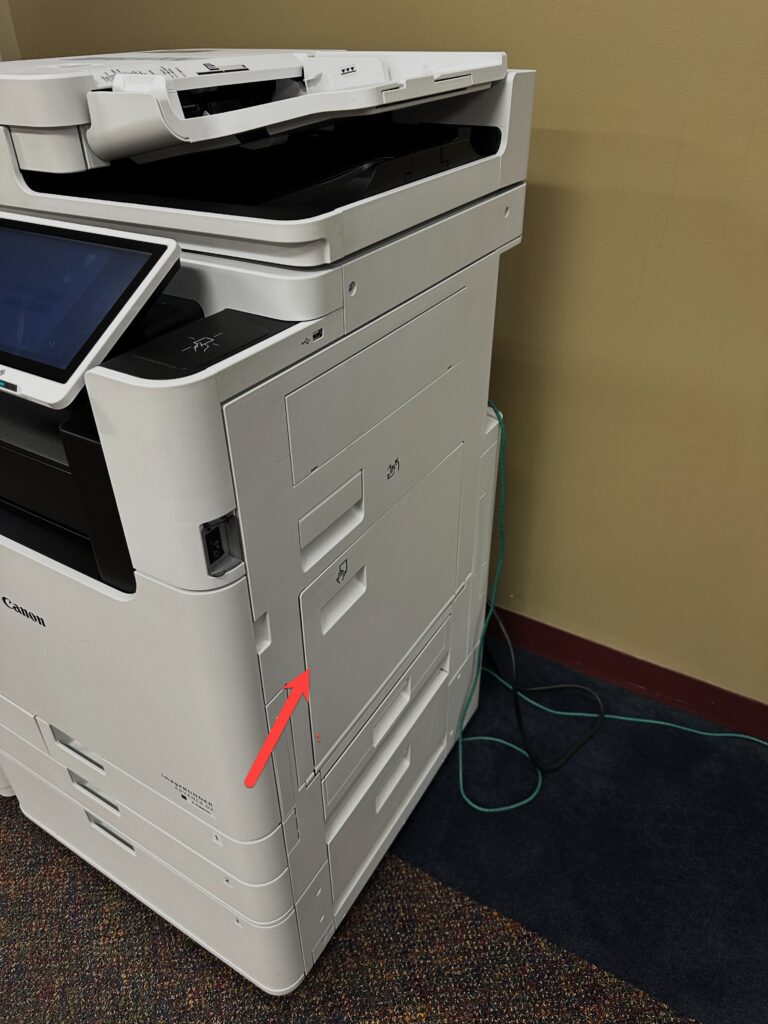
Open the multipurpose tray located on the side of the printer.
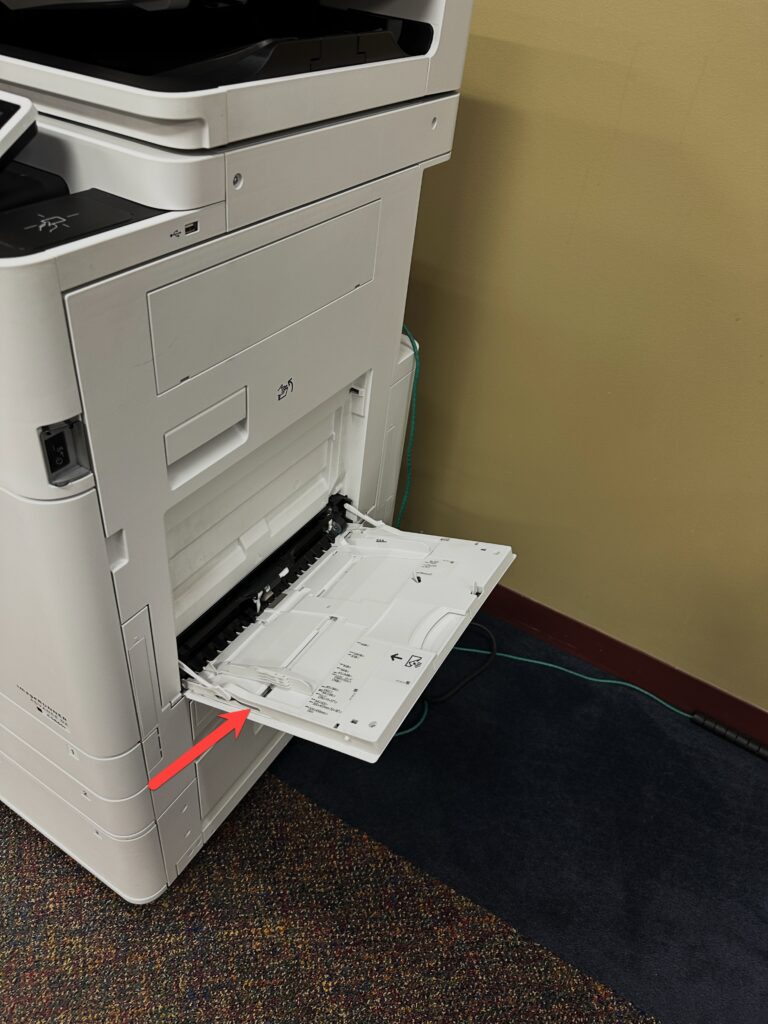
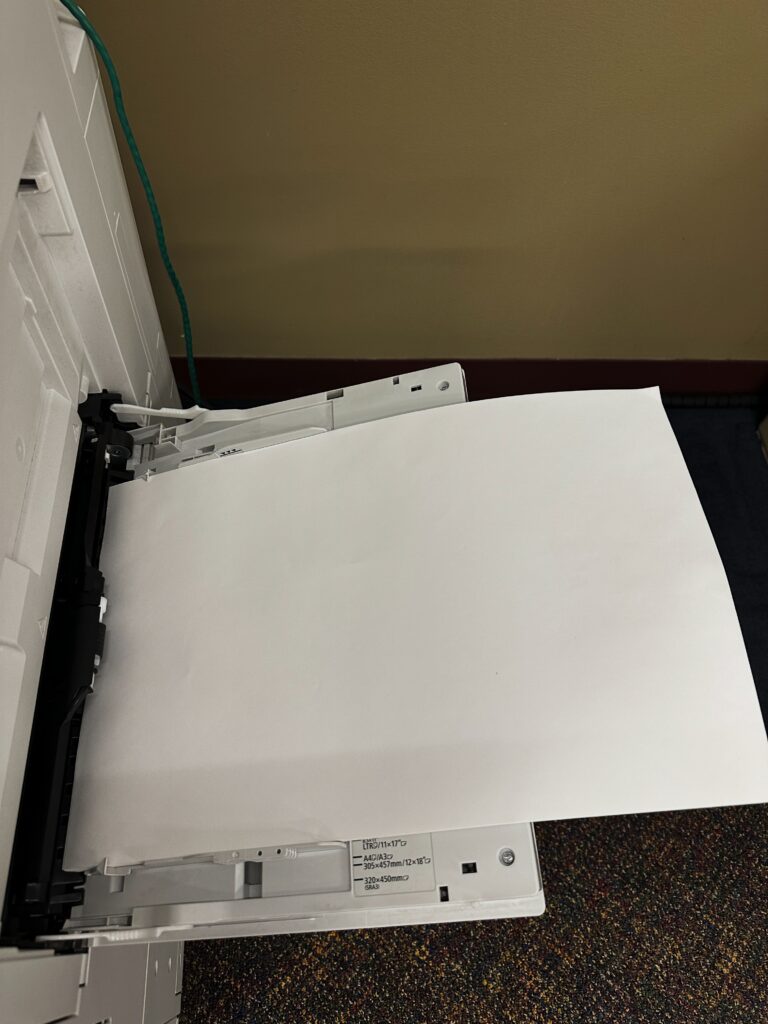
For larger paper sizes, extend the tray to provide additional support. Adjust the paper guides so they fit snugly against the edges of the paper.
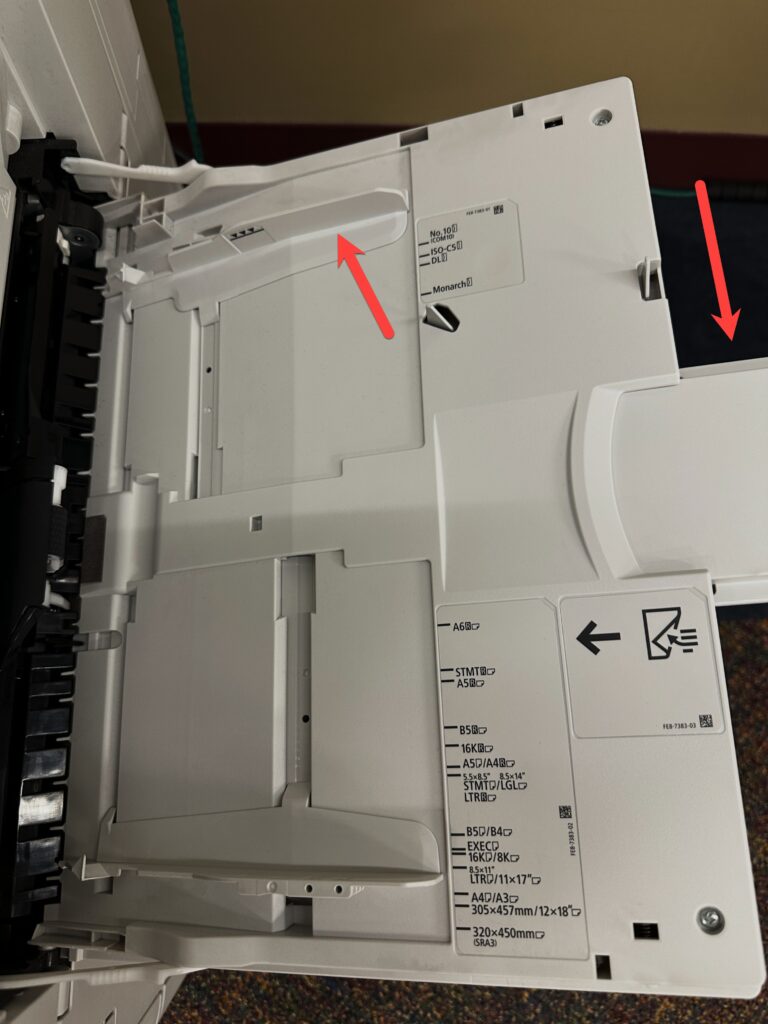
Load the paper into the tray and adjust the guides until they match the paper size.
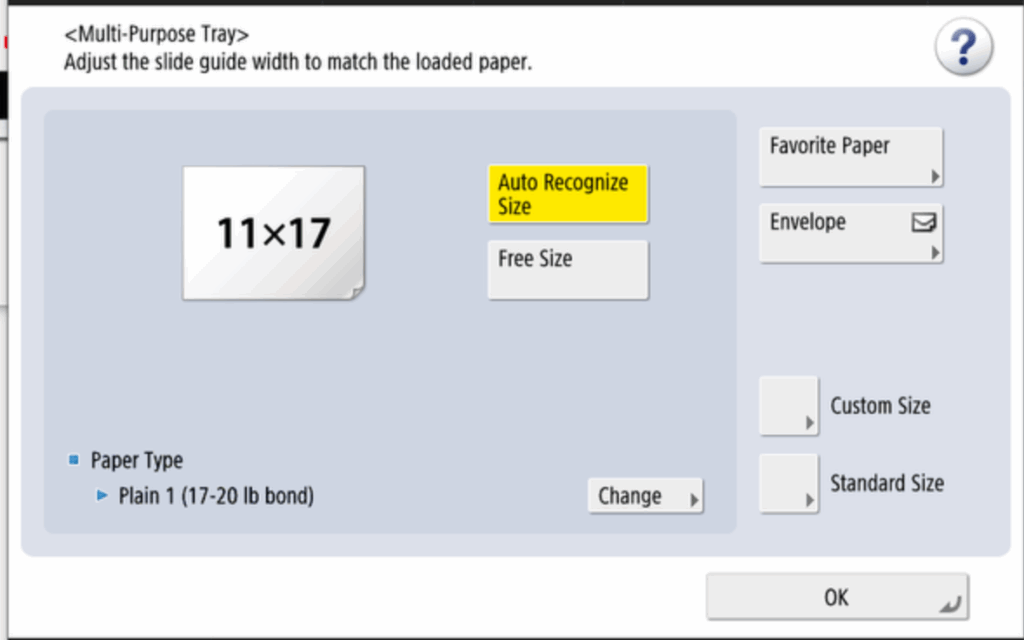
The printer will prompt you to confirm the detected paper size. Verify that the displayed size matches the paper you loaded, make any necessary adjustments, and select OK.
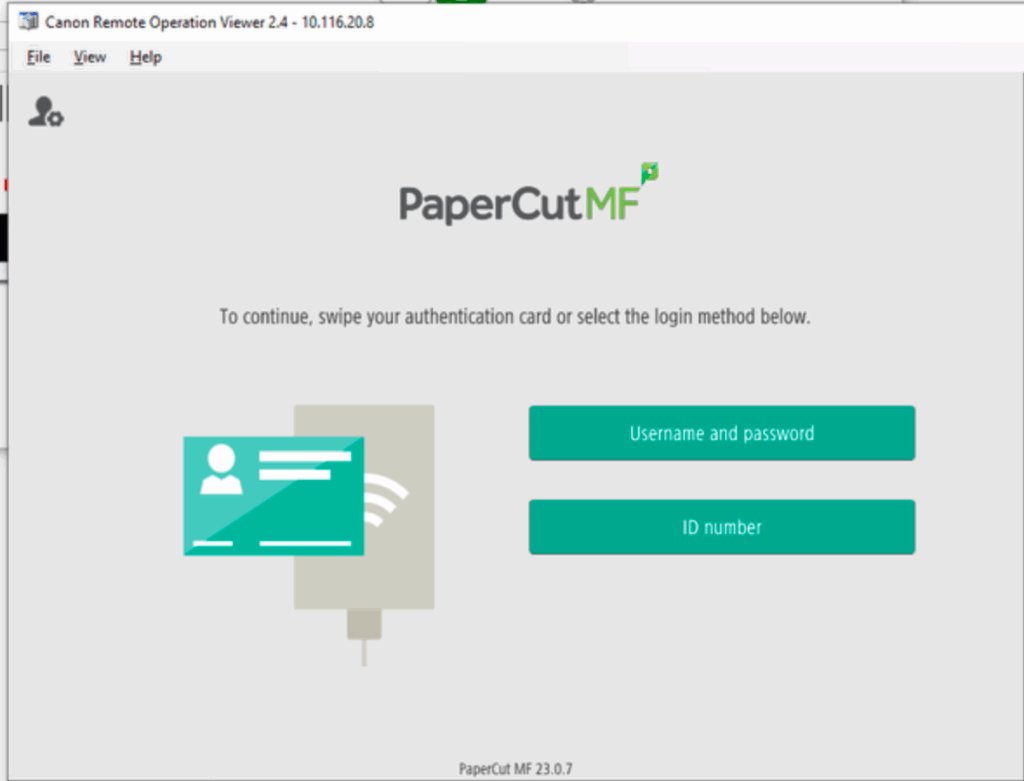
After sending your print job, sign in at the printer using your ID card or one of the available on-screen sign-in methods.
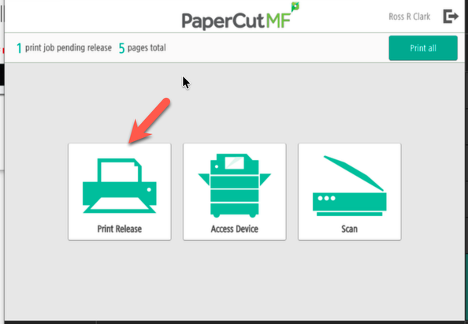
You should now see your pending print jobs. Rather than selecting Print All, choose Print Release so you can review the job settings before printing.
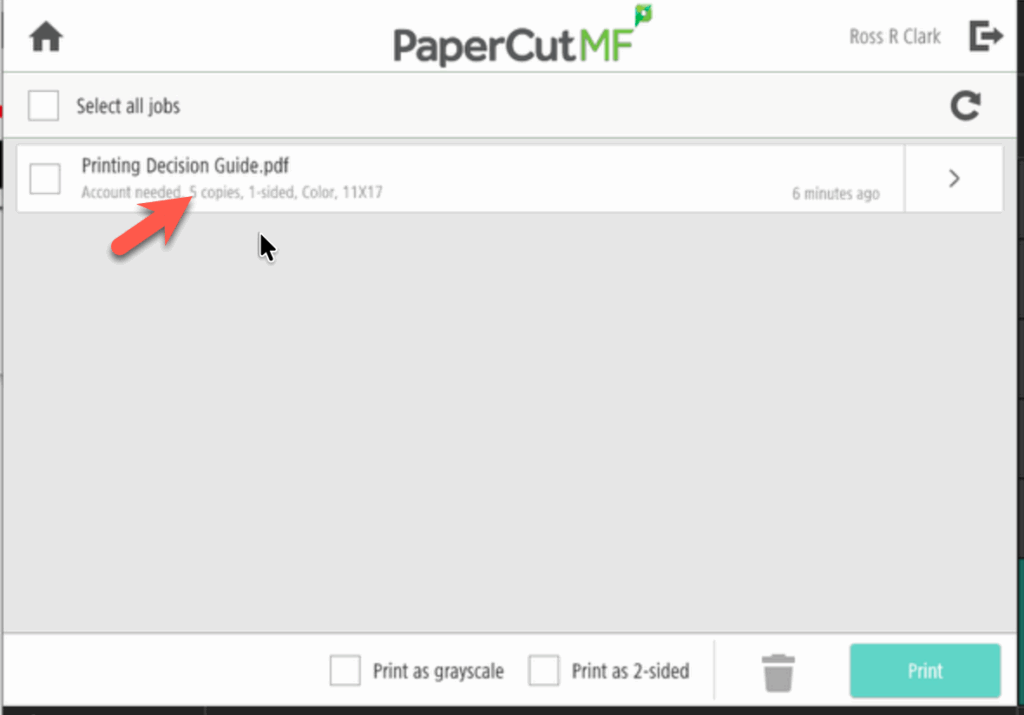
Review the print settings to ensure they match your requirements, including the number of copies, color mode, duplex setting, and paper size. If changes are needed, select the arrow beside the print job to edit the settings.
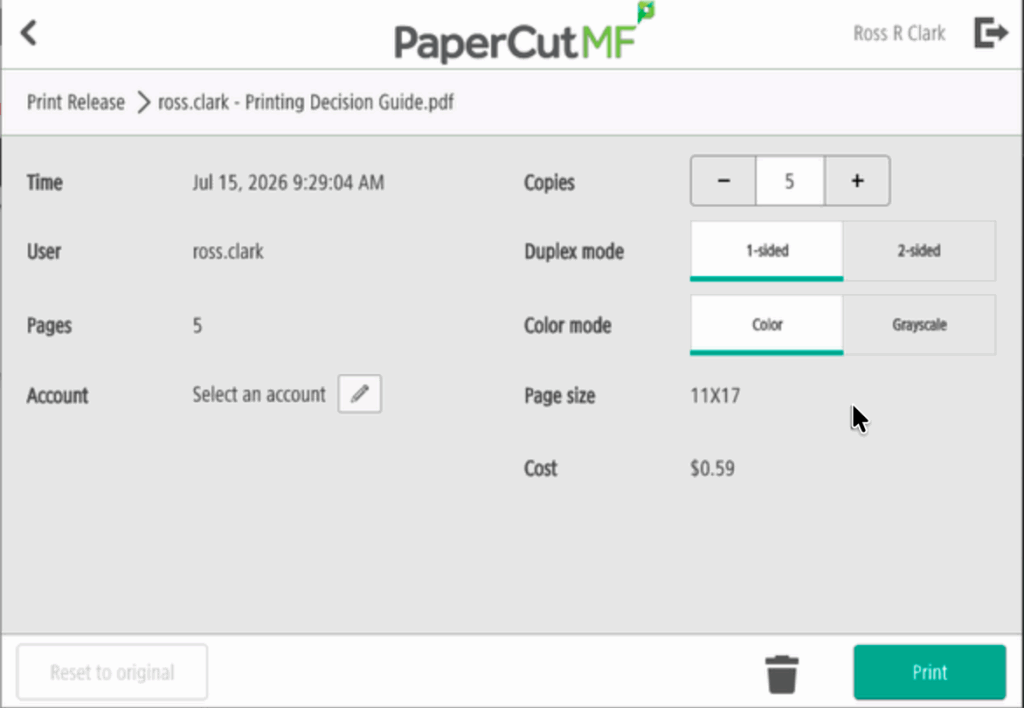
From this screen, you can adjust the number of copies, switch between one-sided and two-sided printing, and change between color and grayscale before releasing the job.
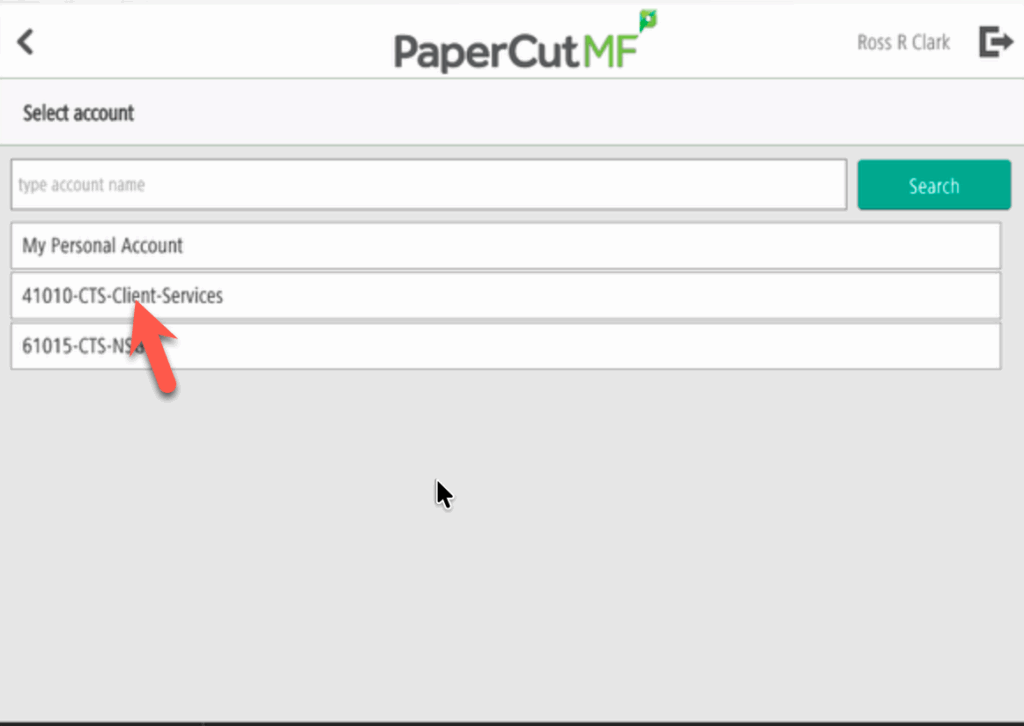
When everything looks correct, select Print, choose the appropriate charge account, and release the job.
Troubleshooting
If the printer displays a paper size or tray error after you release the job, select Status Monitor to view the issue.
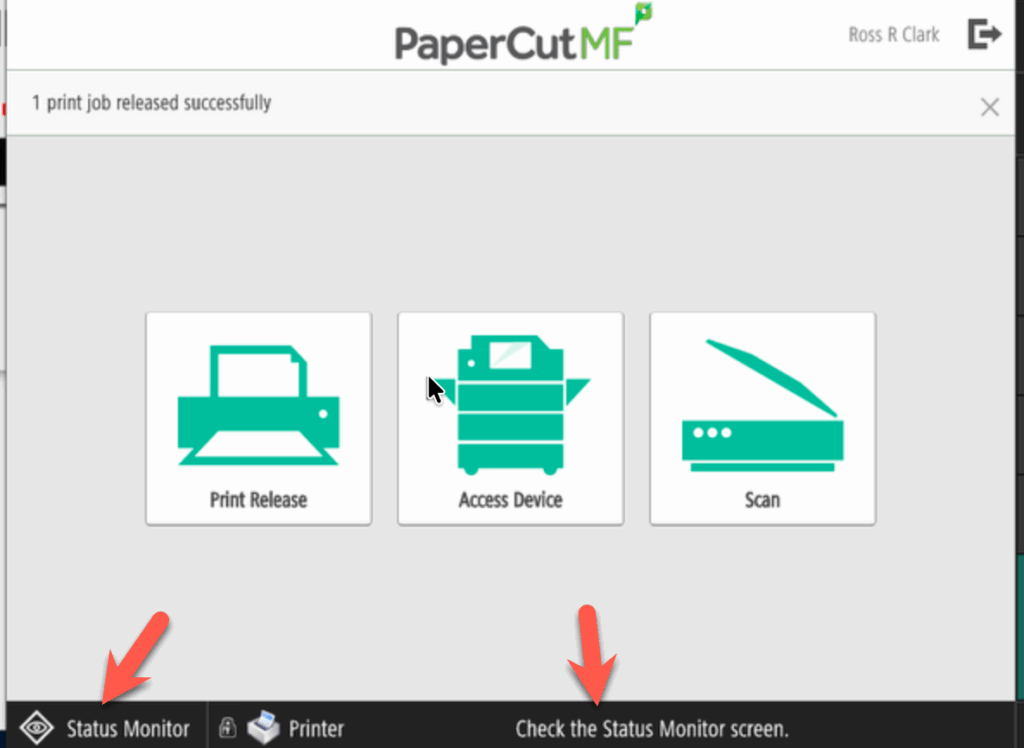
In this example, the print job was not configured to use the Multipurpose Tray, causing the printer to pause because it couldn't locate the requested paper.
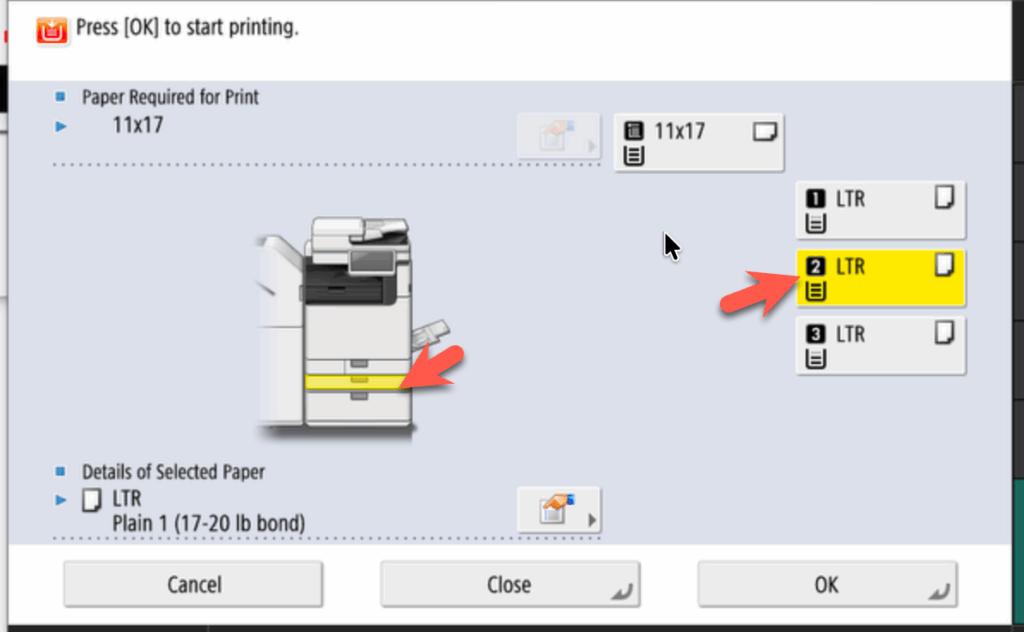
Select the tray containing the correct paper, then choose OK to continue printing. Your print job should resume normally.
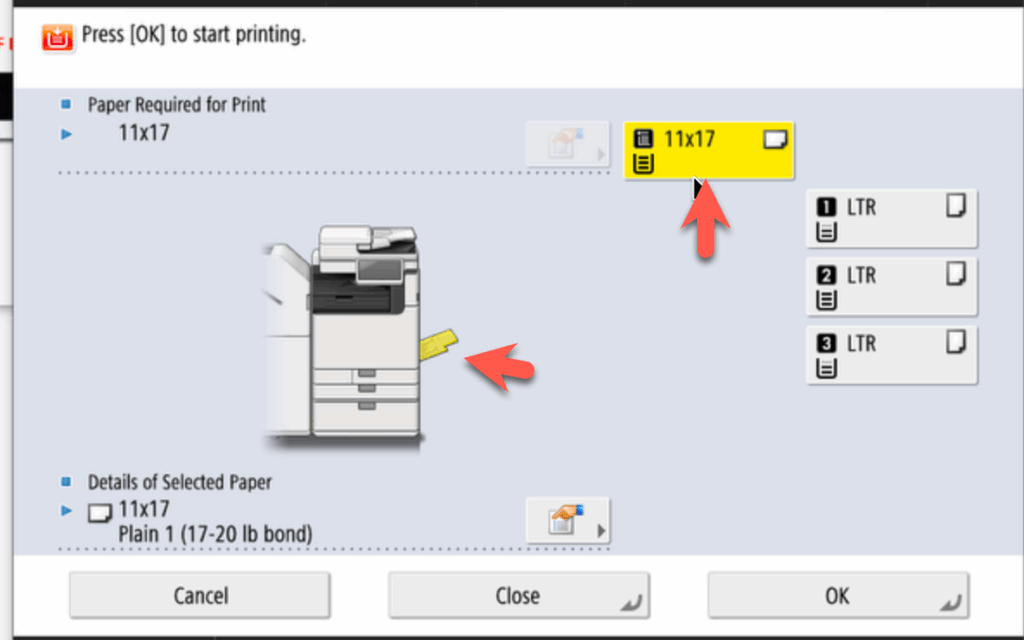
Some campus printers have internal trays configured for 11 × 17 paper. If your department prints this size frequently, you may prefer using an internal tray instead of the Multipurpose Tray. If you do, remember to update your print preset so it references the correct paper source.
The same process can be used when printing other supported paper sizes on Canon campus printers by selecting the appropriate paper size and paper source.